Product Description
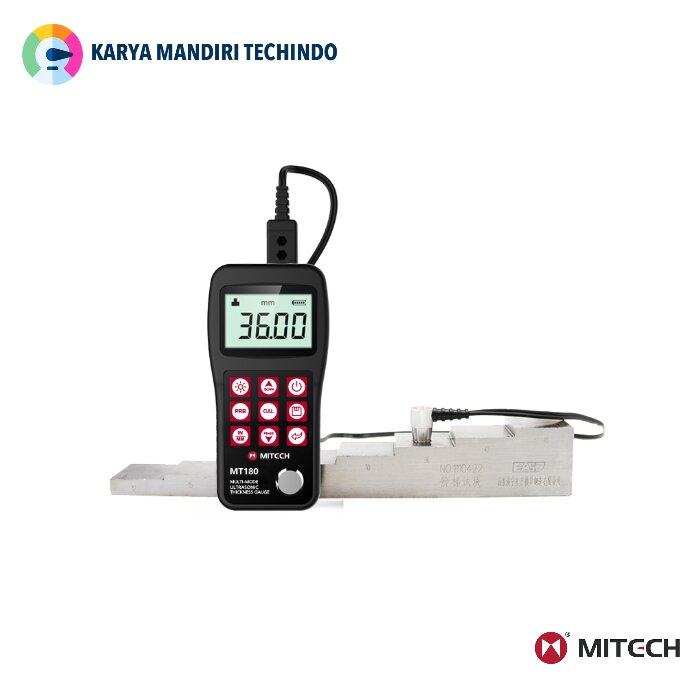
MITECH MT180 Multi-Mode Ultrasonic Thickness Gauge
Karya Mandiri Techindo has a wide range of Mitech products – search by type, or model, or filter by brand to find the one you are after. If you still can’t find it contact us..
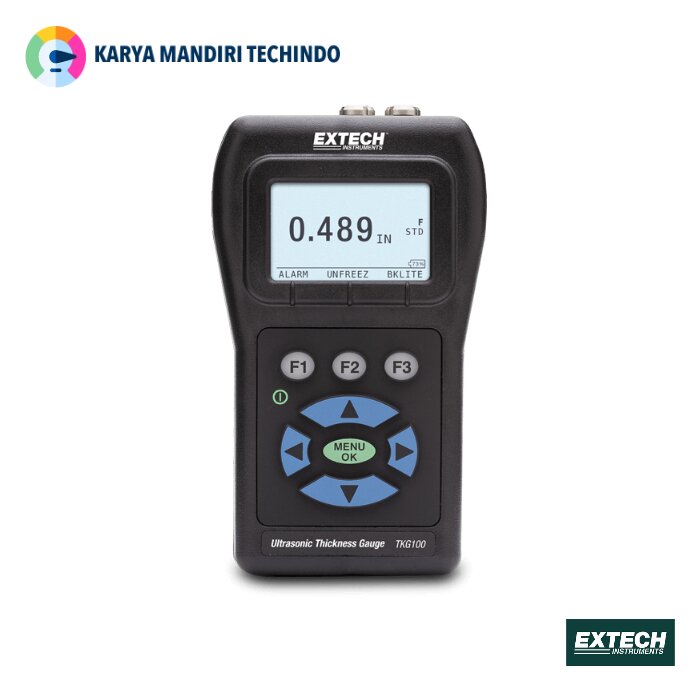
The MITECH MT180 Multi Mode Thickness Gauge is a thickness measuring instrument used to measure hard or solid objects. This instrument is used based on ultrasonic measurement principle, it can perform thickness measurement on various materials including metal, plastic, ceramic glass and other ultrasonic conductive materials.
It is also capable of measuring the speed of sound of objects of known thickness. Compared with traditional measuring methods, the advantage of the ultrasonic thickness gauge is that it can complete the measurement only when it is in contact with one side of the workpiece being measured.
Its unique performance of being able to test thickness through coatings provides an efficient solution for testing workpieces from coated surfaces or corroded materials. Can test the workpiece directly without the need to remove the surface layer. It is widely used to monitor various pipelines of production equipment and reduce the corrosion rate of ship corrosion in the fields of petroleum, chemical, metallurgy, shipbuilding, aviation, aerospace and so on.
It can also be used to make accurate measurements to various plates and machining parts. It is a professional precision instrument needed to improve production efficiency and qualification rate and save costs.
Function & application
Capable of performing measurements on a wide range of material, including metals, plastic, ceramics, composites, epoxies, glass and other ultrasonic wave well-conductive materials.Transducer models are available for special application, including for coarse grain material and high temperature applications.
Working Principle
The digital ultrasonic thickness gauge determines the thickness of a part or structure by accurately measuring the time required for a short ultrasonic pulse generated by a transducer to travel through the thickness of the material, reflect from the back or inside surface, and be returned to the transducer. The measured two-way transit time is divided by two to account for the down-and-back travel path, and then multiplied by the velocity of sound in the material. The result is expressed in the well-known relationship: H=v×t/2
Where:
H-Thickness of the test piece.
v-Sound Velocity in the material.
t-The measured round-trip transit time.
Working Conditions
- Operating Temperature: -20℃~+60℃
- Storage Temperature:-30℃~+70℃
- Relative Humidity ≤90%
- The surrounding environment should avoid of vibratin, strong magentic field, corrosive medium and heavy dust
Features MITECH MT180 Multi-Mode Ultrasonic Thickness Gauge
- Multi-mode: Pulse-Echo mode and Echo-Echo mode.
- Capable of performing measurements on a wide range of material, including metals, plastic, ceramics, composites, epoxies, glass and other ultrasonic wave well-conductive materials.
- Transducer models are available for special application, including for coarse grain material and high temperature applications.
- Probe-Zero function, Sound-Velocity-Calibration function
- Two-Point Calibration function.
- Single point mode and Scan mode. Seven measurements readings per second in single point mode, and sixteen per second in Scan Mode.
- Coupling status indicator showing the coupling status.
- Units: Metric/Imperial unit selectable.
- Battery information indicates the rest capacity of the battery.
- Auto sleep and auto power off function to conserve battery life.
- Optional software to process the memory data on the PC.
Operating Method and Attentions
Measuring pipe and tubing
- When measuring a piece of pipe to determine the thickness of the pipe wall, orientation of the transducers is important. If the diameter of the pipe is larger than approximately 4 inches, measurements should be made with the transducer oriented so that the gap in the wearface is perpendicular (at right angle) to the long axis of the pipe. For smaller pipe diameters, two measurements should be performed, one with the wearface gap perpendicular, another with the gap parallel to the long axis of the pipe. The smaller of the two displayed values should then be taken as the thickness at that point.
Measuring hot surfaces
- The velocity of sound through a substance is dependant upon its temperature. As materials heat up, the velocity of sound through them decreases. In most applications with surface temperatures less than about 100℃, no special procedures must be observed. At temperatures above this point, the change in sound velocity of the material being measured starts to have a noticeable effect upon ultrasonic measurement. At such elevated temperatures, it is recommended that the user perform a calibration procedure on a sample piece of known thickness, which is at or near the temperature of the material to be measured. This will allow the gauge to correctly calculate the velocity of sound through the hot material.When performing measurements on hot surfaces, it may also be necessary to use a specially constructed high-temperature transducer. These transducers are built using materials which can withstand high temperatures. Even so, it is recommended that the probe be left in contact with the surface for as short a time as needed to acquire a stable measurement. While the transducer is in contact with a hot surface, it will begin to heat up, and through thermal expansion and other effects, may begin to adversely affect the accuracy of measurements.
Measuring laminated materials
- Laminated materials are unique in that their density (and therefore sound-velocity) may vary considerably from one piece to another. Some laminated materials may even exhibit noticeable changes in sound-velocity across a single surface. The only way to reliably measure such materials is by performing a calibration procedure on a sample piece of known thickness. Ideally, this sample material should be a part of the same piece being measured, or at least from the same lamination batch. By calibrating to each test piece individually, the effects of variation of sound-velocity will be minimized.An additional important consideration when measuring laminates, is that any included air gaps or pockets will cause an early reflection of the ultrasound beam. This effect will be noticed as a sudden decrease in thickness in an otherwise regular surface. While this may impede accurate measurement of total material thickness, it does provide the user with positive indication of air gaps in the laminate.
Suitability of materials
- Ultrasonic thickness measurements rely on passing a sound wave through the material being measured. Not all materials are good at transmitting sound. Ultrasonic thickness measurement is practical in a wide variety of materials including metals, plastics, and glass. Materials that are difficult include some cast materials, concrete, wood, fiberglass, and some rubber.
Couplants
- All ultrasonic applications require some medium to couple the sound from the transducer to the test piece. Typically a high viscosity liquid is used as the medium. The sound used in ultrasonic thickness measurement does not travel through air efficiently.A wide variety of couplant materials may be used in ultrasonic gauging. Propylene glycol is suitable for most applications. In difficult applications where maximum transfer of sound energy is required, glycerin is recommended. However, on some metals glycerin can promote corrosion by means of water absorption and thus may be undesirable. Other suitable couplants for measurements at normal temperatures may include water, various oils and greases, gels, and silicone fluids. Measurements at elevated temperatures will require specially formulated high temperature couplants.Inherent in ultrasonic thickness measurement is the possibility that the instrument will use the second rather than the first echo from the back surface of the material being measured while in standard pulse-echo mode. This may result in a thickness reading that is TWICE what it should be. The Responsibility for proper use of the instrument and recognition of these types of phenomenon rests solely with the user of the instrument.
Instrument Maintenance
When the thickness gauge appears some other abnormal phenomena, please do not dismantle or adjust any fixedly assembled parts. Fill in and present the warranty card to us. The warranty service can be carried on. Keep it away from vibration, strong magnetic field, corrosive medium, dumpiness and dust. Storage in ordinary temperature. With Original packing, transport is allowed on the third grade highway.
Specifications MITECH MT180 Multi-Mode Ultrasonic Thickness Gauge
| Measuring Range | 0.65-600mm( P-E), 3-30mm (E-E) |
| Working Frequency | (2.5-7)MHZ |
| Probe Diameter | Standard Probe P5EE is 10mm, Probe N05 is10MM、Probe N07 is 6MM、Probe HT5 is12MM、Probe N02 is12MM |
| Min. Pipe Diameter | Φ15mm×2.0mm |
| Resolution | 0.1/0.01mm |
| Accuracy | ±(0.5%Thickness+0.01)mm |
| Display | 4.5 digits LCD with EL backlight |
| Single /Scan Mode | Seven measurements readings per second in single point mode, and sixteen per second in Scan Mode |
| Probe Calibration | Zero Calibration, Two-Point Calibration |
| Velocity Range | 1000-9999m/s |
| Unit | Metric/Imperial unit selectable |
| Language | English |
| Memory | up to 20 files (up to 99 values for each file) of stored values |
| Communication Port | USB |
| Data Printing | Yes |
| Power supply | Two “AA” size, 1.5 Volt alkaline batteries |
| Lower Power Comsumption | Yes |
| Working Hours | 100h (EL backlight off). |
| Operating Temperature | -20℃-+60℃ |
| Relative Huminity | ≤90% |
| Appearance | ABS Plastic |
| Outline | 150mm×74mm×32 mm |
| Gross Weight | 1.5 KG |
| PC Datapro Software | Yes |
| Speech Function | No |
 MITECH MT180 – Datasheet
KARYA MANDIRI TECHINDO adalah Supplier MITECH MT180 Multi-Mode Ultrasonic Thickness Gauge dan juga menjual Brand Mitech. Lihat produk kami lainnya di sini JSI, SGI, SMG atau hubungi kami lewat Whatsapp 0821-3010-0456 atau via email [email protected].

